How-To Guide 04
How to localize screenshot sets with Apple Translate.
Localization is one of the clearest reasons the project model matters. Translation writes back into the existing text overlays, which means the composition stays live instead of breaking into separate files or manual rebuilds.
What You'll Build
A localized screenshot set that still uses the same underlying layouts, layers, and export flow as the original language version.
What You'll Use
Project-level translation, text overlays, layout adjustment, and multi-canvas export.
Screenshot Plan
Use 1 original set image, 1 translate-menu image, 3 translation process images, 1 layout-fix image, and 1 final localized output image.
Step 01
Finish the source-language set before you translate.
Start from a screenshot set that already has the right structure, because translation works best when the underlying layouts and hierarchy are already clear. The tutorial should show the completed source version first.
Screenshot To Add
The original source-language screenshot set before translation begins.
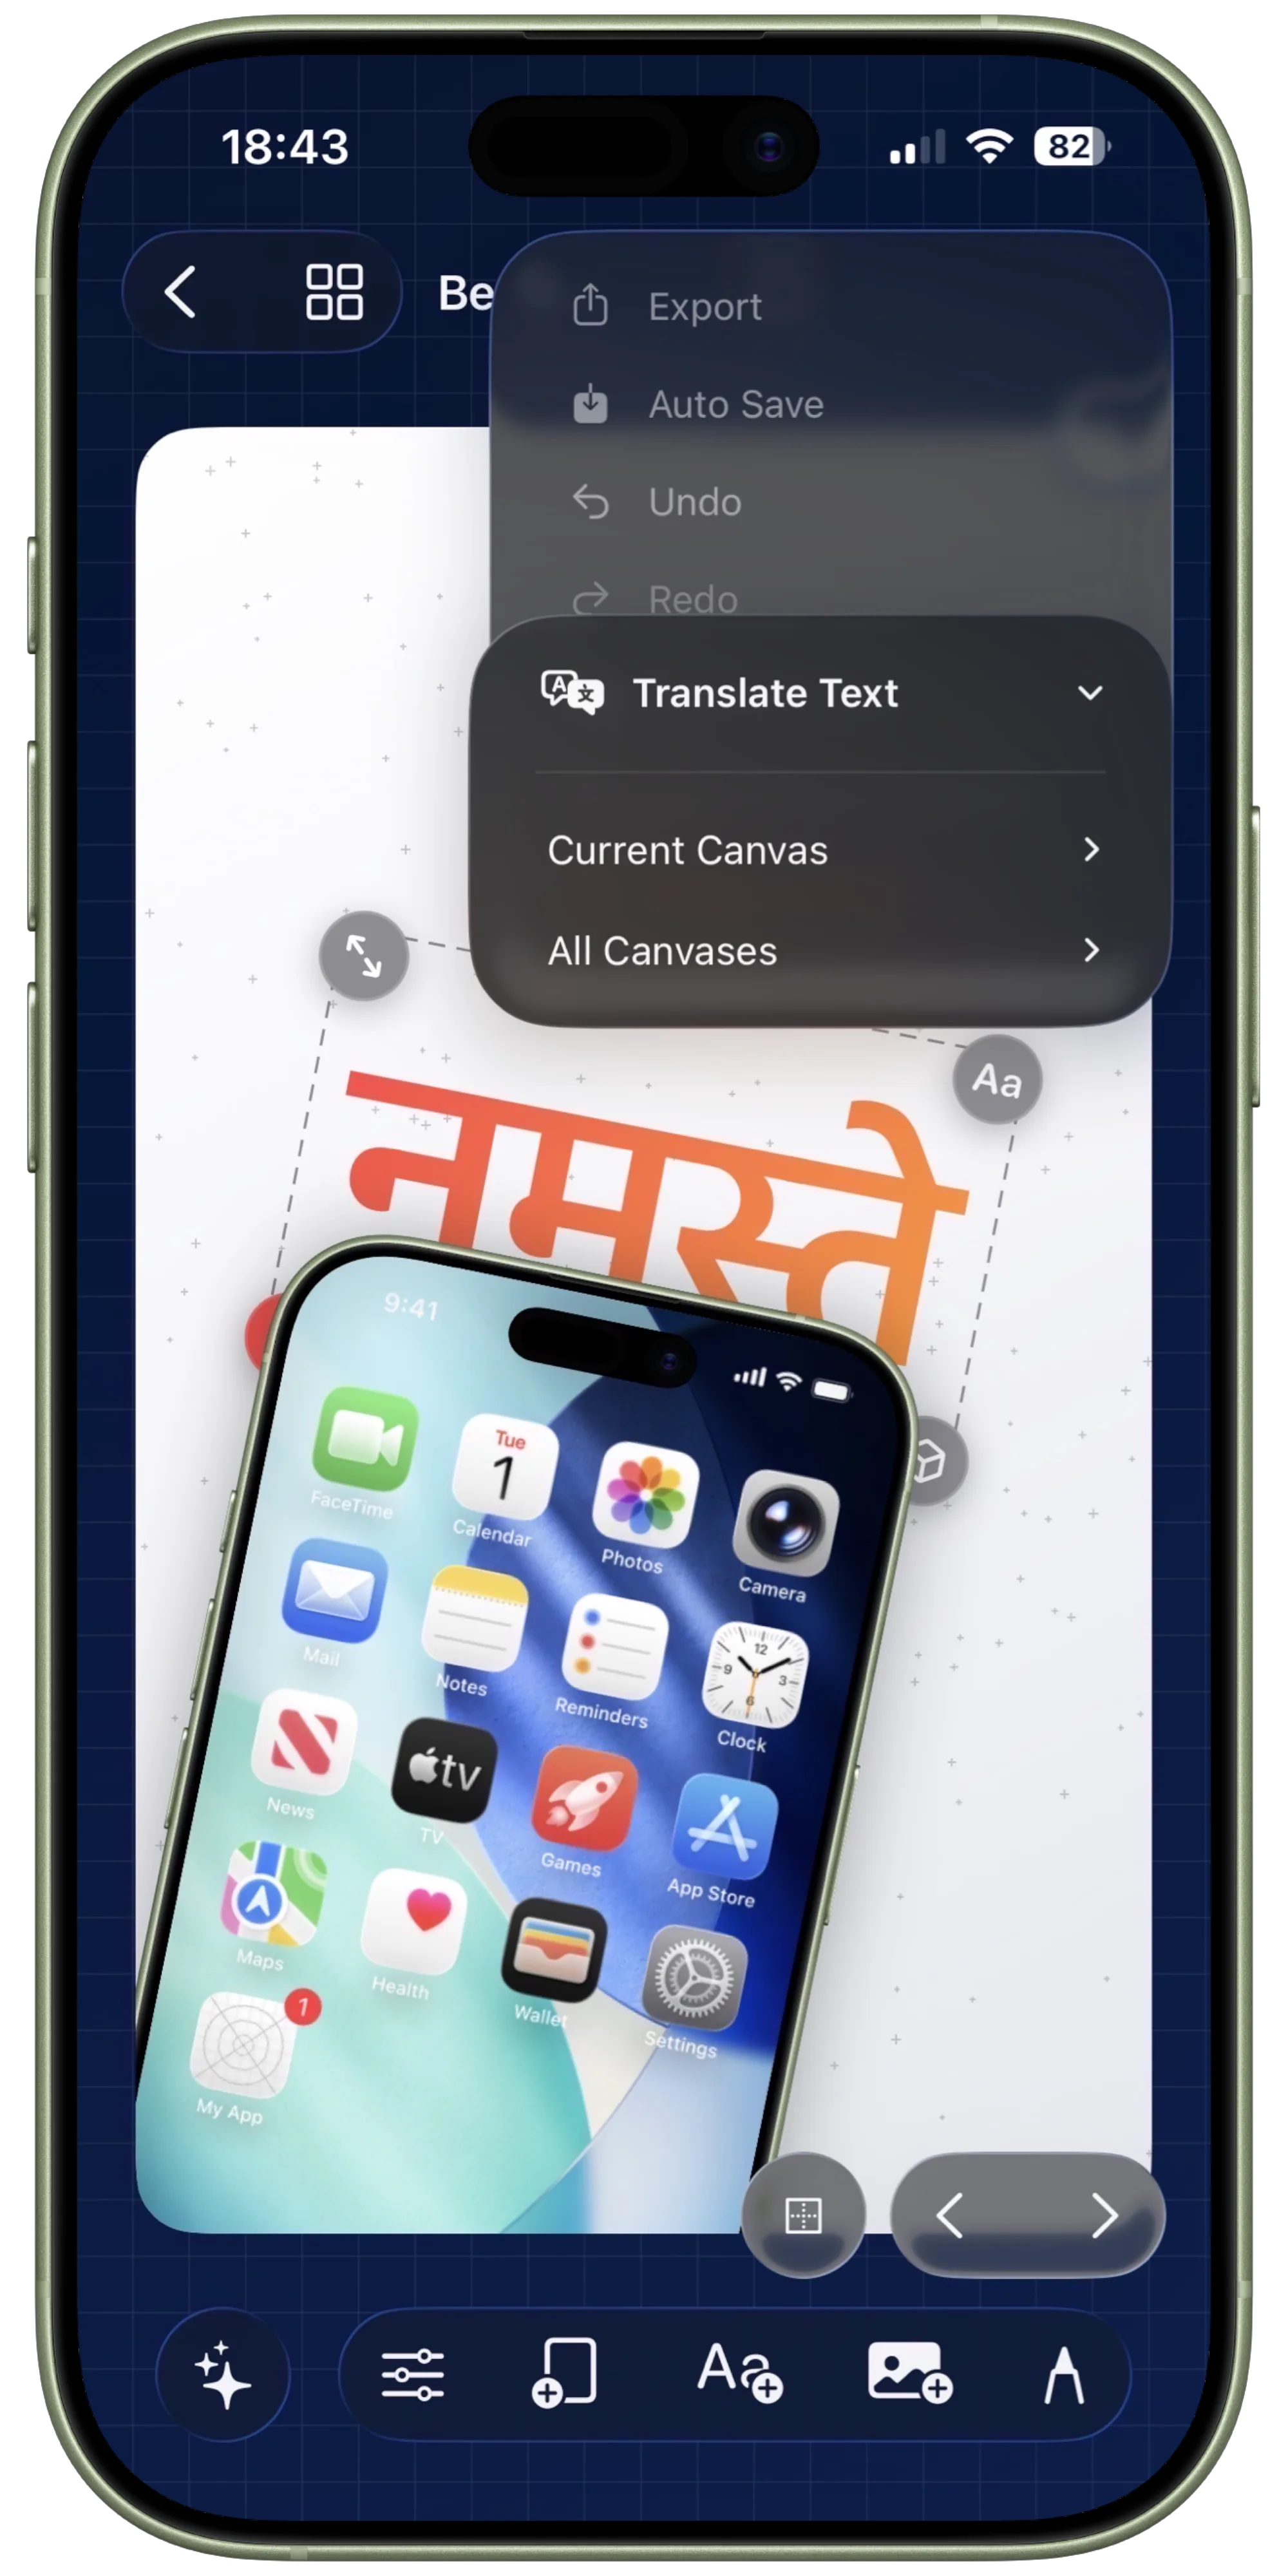
Step 02
Open the translate menu and choose the target language.
Select the language you want and decide whether you want to translate only the current canvas or the full project. This step should make the scope choice visible because it is part of the product’s value.
Screenshot To Add
Translate menu open with a target language selected and current-canvas vs all-canvas scope visible.
Step 03
Let the translated copy write back into the existing overlays.
Run the translation and show how the text changes inside the same live composition. This is the part that should visually separate Bezel Studio from a manual export-and-redesign workflow.
Screenshot To Add
A translated canvas after the text overlays have been updated in place.
Step 04
Review text expansion and tighten the layout.
Some languages will create longer lines or different spacing needs. Use this step to show a real adjustment pass, such as shifting text, resizing a caption block, or rebalancing the frame and copy relationship.
Screenshot To Add
One translated screenshot with a visible layout correction after text expansion.
Step 05
Check the rest of the project for consistency.
Review the full localized set together so the rhythm and balance hold across every screenshot. This is especially important when the project contains many canvases and multiple headlines of different lengths.
Screenshot To Add
A project-wide review of the translated set, ideally in grid mode or a multi-canvas overview.
Step 06
Export the localized set for the target region.
Render the localized version and show it as a complete output, not just a single translated screen. The value of the guide is proving that the same project can carry multiple language deliverables without splitting apart.
Screenshot To Add
The final exported localized screenshot set or a final localized result board.