How-To Guide 10
How to turn imported images into sticker assets with background removal.
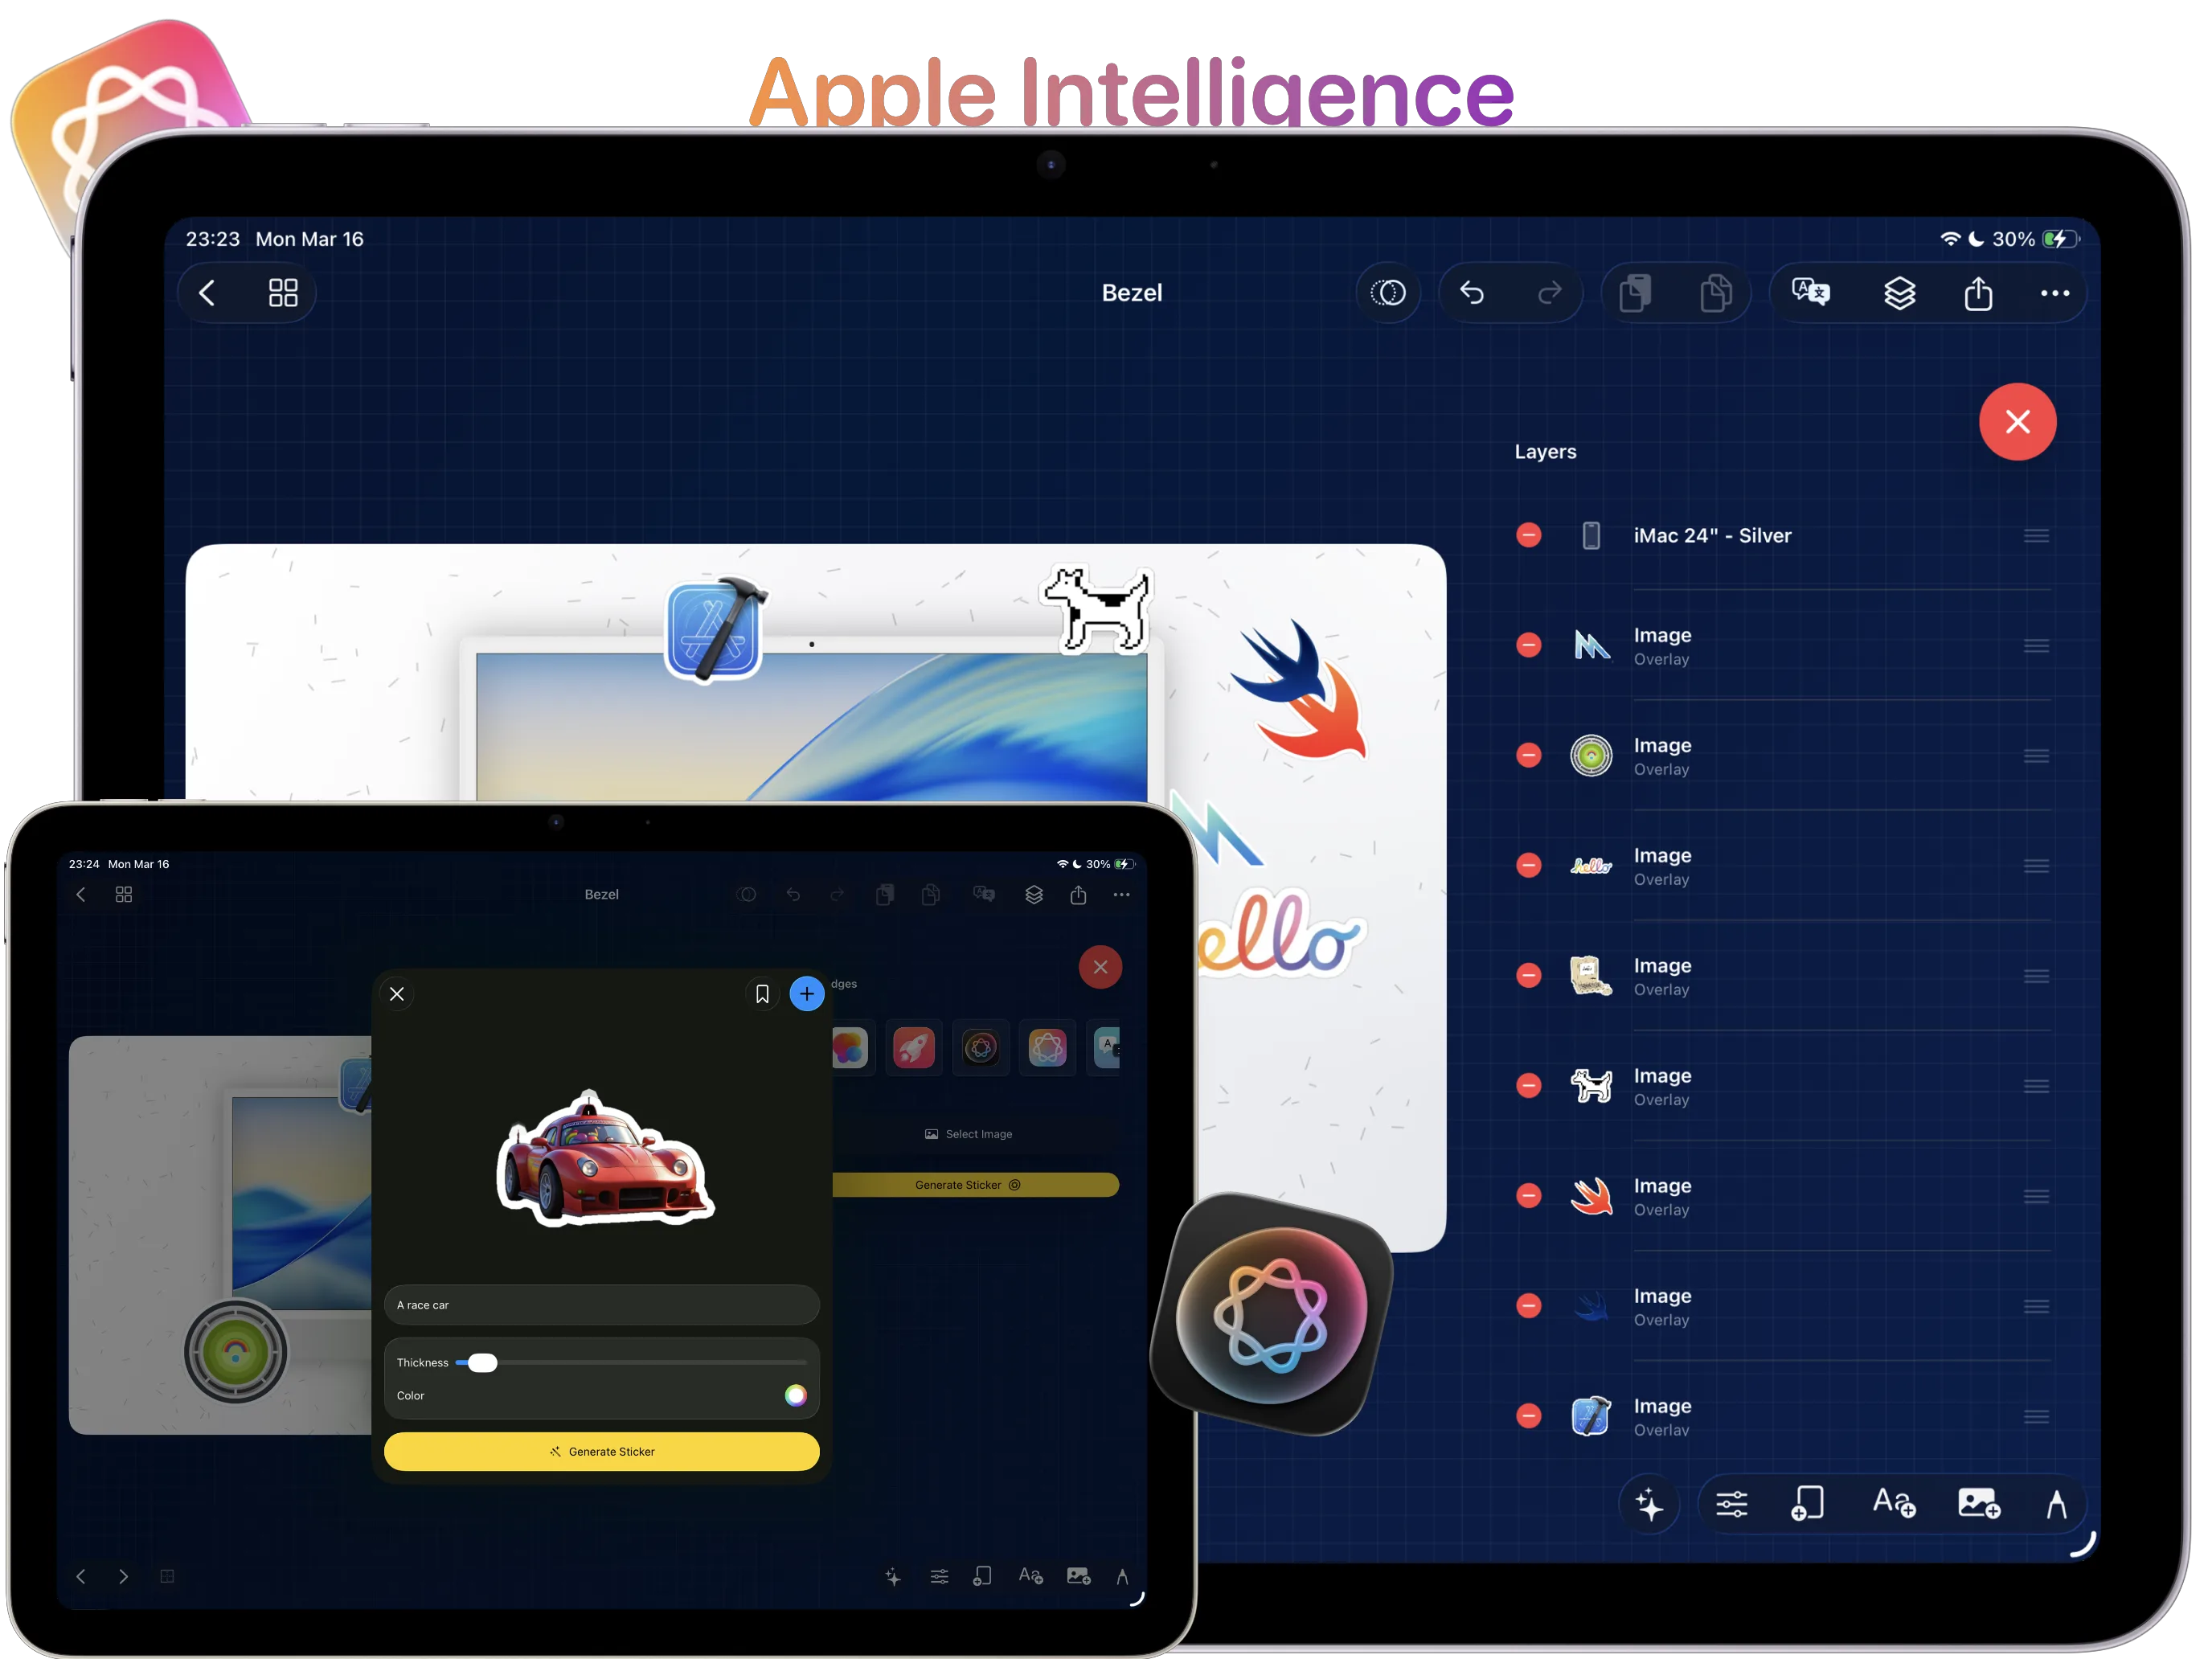
Cutout elements help App Store screenshots explain the screen faster. The trick is to remove the background cleanly, place the sticker with restraint, and keep the product UI as the hero instead of burying it under decoration.
What You'll Build
A screenshot scene supported by one or two cutout sticker assets that reinforce the core feature story.
What You'll Use
Image import, background removal, scale, shadow, placement, and repeatable cutout styling.
Screenshot Plan
Capture 1 source image, 1 background-removal pass, 1 edge cleanup, 1 placement state, 1 duplicated sticker variant, and 1 final export.
Step 01
Choose the screenshot or imported image worth cutting out.
Start with the visual that actually needs emphasis. If the main screenshot already explains the moment clearly, skip the sticker. This step matters because cutouts should support the story, not become a default decoration.
Screenshot To Add
The screenshot or imported image selected as the source for the sticker asset.
Step 02
Remove the background so the hero element becomes a sticker asset.
Use the workflow from the App screenshot stickers and callouts feature page to isolate the element cleanly. The faster the background disappears, the sooner you can judge whether the cutout is actually helping the scene.
Screenshot To Add
Background removal in progress while the future sticker asset is being isolated.
Step 03
Clean the edges and scale the sticker for the composition.
Tighten the silhouette, then scale the cutout so it feels intentional next to the primary screenshot. If the scene already uses depth, borrow the spacing decisions from the layers and 3-axis transforms guide before the sticker enters.
Screenshot To Add
A cleaned sticker edge with the cutout scaled and positioned next to the screenshot.
Step 04
Place the cutout where it supports the product story.
Use the sticker to call out a feature, support a caption, or extend the brand shape language. Keep it away from the core interface so the App Store screenshot still reads like product marketing instead of a collage.
Screenshot To Add
The sticker asset placed in the composition with space preserved around the product UI.
Step 05
Duplicate the sticker treatment for the rest of the set.
Carry the same cutout style into the next canvas so it becomes a system instead of a one-off effect. When the next screen needs more explicit explanation, move into the PencilKit callouts guide.
Screenshot To Add
The sticker treatment reused on a second screenshot or device size inside the same campaign set.
Step 06
Save and export the final sticker-backed screenshot.
Export the still, zoom out, and check that the sticker added clarity rather than clutter. The right cutout should survive the full delivery pass later in the stills and videos export guide.
Screenshot To Add
The final sticker-backed screenshot ready for export with the source image still visible for comparison.