How-To Guide 09
How to use layers and 3-axis transforms to build more dimensional compositions.
Once the caption and screenshot already work on a flat canvas, depth is the next lever. Layers and perspective let you build a more cinematic App Store composition without losing legibility or alignment.
What You'll Build
A layered App Store screenshot scene with enough perspective to feel premium without sacrificing clarity.
What You'll Use
Layer ordering, snap guides, spacing control, perspective rotation, and disciplined depth.
Screenshot Plan
Show 1 flat starting scene, 2 layer-setup states, 2 perspective adjustments, 1 depth-balanced layout, and 1 final export comparison.
Step 01
Start with a stable base screenshot and caption system.
Build on top of a layout that already works in two dimensions. If the text or screenshot is still unresolved, return to the caption styling guide before adding perspective on top of unfinished decisions.
Screenshot To Add
A flat but already polished screenshot composition before layer separation begins.
Step 02
Separate the scene into layers you can control independently.
Use the controls from the precision app screenshot layouts and layers feature page to split the frame, screenshot, caption, and accent shapes into deliberate groups. Depth is impossible if everything stays welded into one flat block.
Screenshot To Add
The canvas reorganized into separate layers or groups before perspective is applied.
Step 03
Use snap precision to clean the spacing before adding depth.
Lock the spacing while the scene is still flat, then move into the 3-axis transforms, rotation, and perspective feature page. Clean spacing first keeps the depth pass from becoming an excuse to hide basic alignment problems.
Screenshot To Add
Snap guides or alignment helpers visible while the scene is tightened before rotation.
Step 04
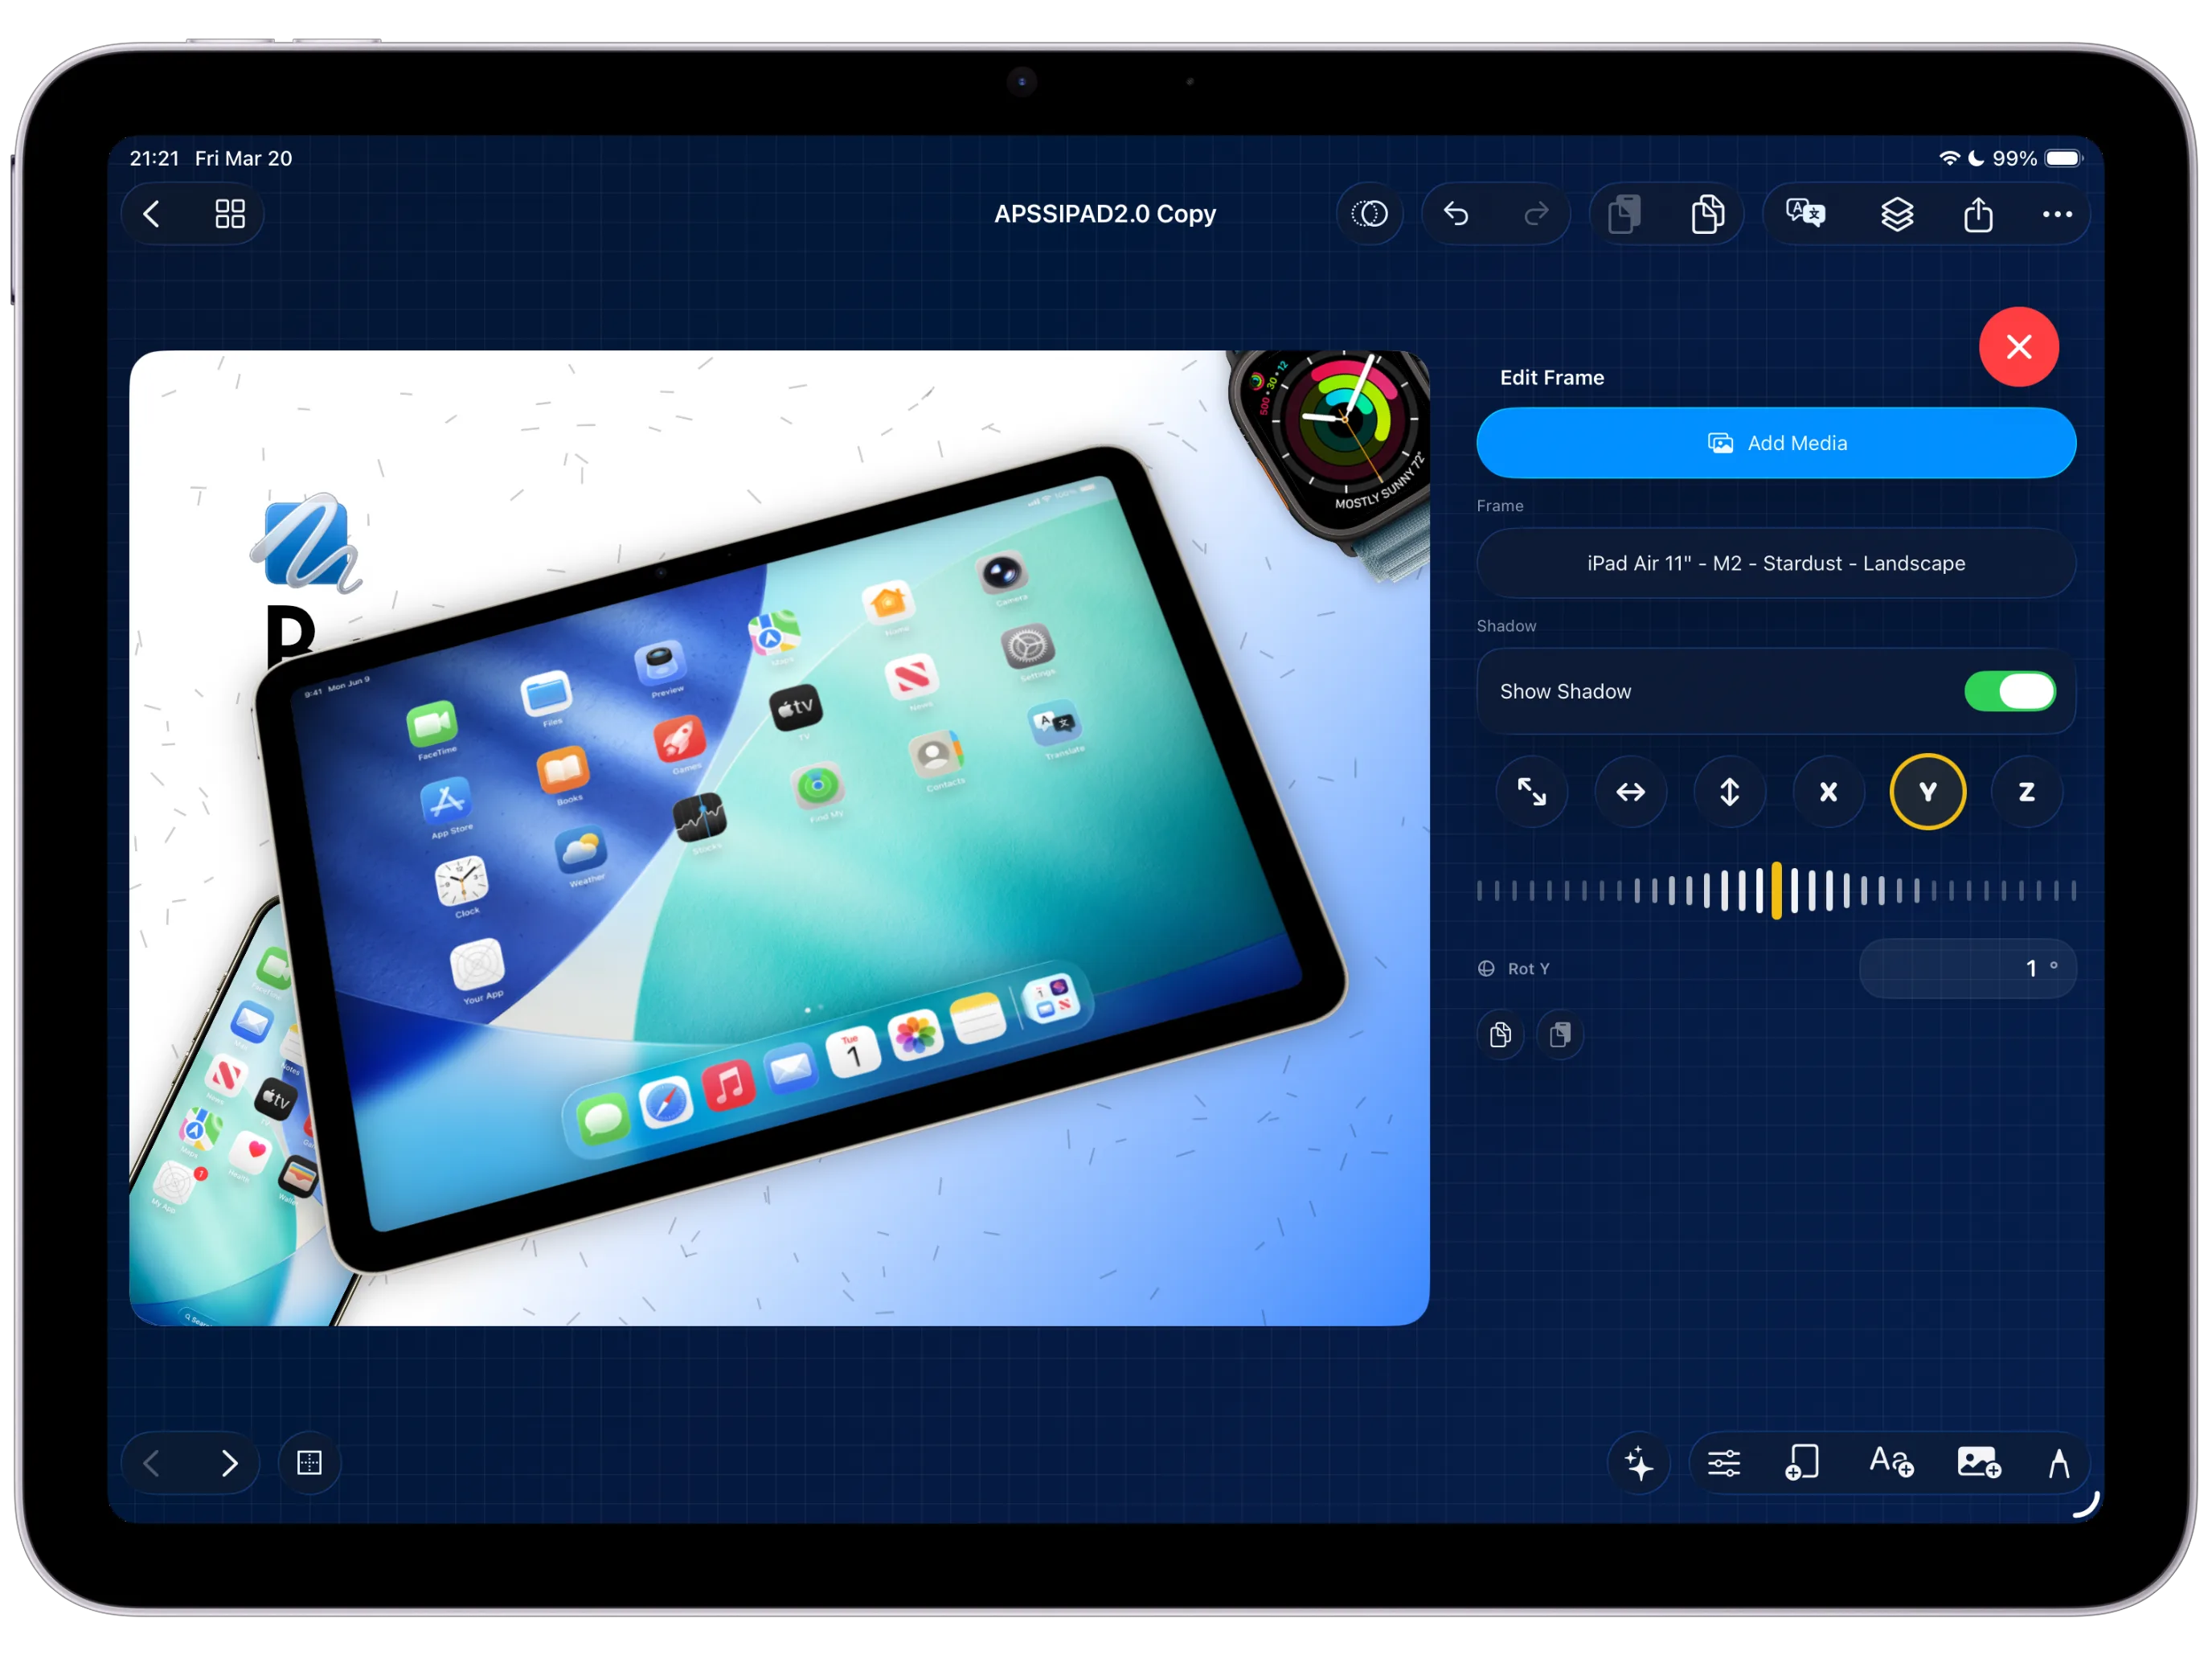
Apply 3-axis rotation and perspective to one hero element.
Tilt the framed device or one supporting layer first. A single strong perspective move usually sells the scene better than rotating every object on the canvas in different directions.
Screenshot To Add
One device or hero layer rotated in 3-axis space while the rest of the scene stays controlled.
Step 05
Balance foreground and background layers so the screen still reads clearly.
Bring accents forward, push support shapes back, and stop when the product screen still reads at a glance. If the scene needs more emphasis than perspective can provide, the sticker assets guide is the next step.
Screenshot To Add
The scene with a clear depth hierarchy between hero device, text, and supporting accents.
Step 06
Export the dimensional composition and compare it against the flat version.
A good depth pass should feel more deliberate, not merely more dramatic. Compare both versions before shipping, then save the dimensional one for later in the release export workflow.
Screenshot To Add
The final dimensional mockup compared to the earlier flat composition before export.